
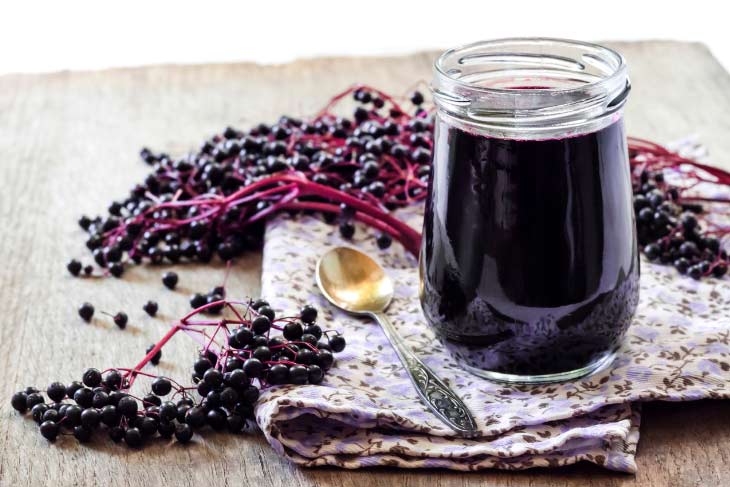
Homemade elderberry syrup is healthy, delicious, and costs a fraction of a store-bought one. I started making our own elderberry syrup years ago, and after a little fiddling and tweaking around, I’m finally satisfied. This is my BEST elderberry syrup recipe so far – I hope you love it as much as we do! This recipe for homemade elderberry syrup works with both fresh and dried elderberries, and even though we use honey in ours, you can easily tweak it for a vegan elderberry syrup recipe that’s also suitable for babies.
Just how healthy is elderberry syrup? Elderberry syrup from black elderberries is primarily known for its medicinal benefits in the prevention and treatment of the common cold and flu, but there are other ways elderberries can improve your health beyond the flu season! Read about the health benefits of elderberries that are supported by science if you don’t believe me. (You shouldn’t believe me. Go ahead and read it.)
In this article:
- Elderberry syrup recipe
- Ingredient breakdown
- Elderberry syrup recipe without honey
- How long should elderberries be cooked?
- Storing + shelf life of homemade elderberry syrup
- How much syrup to take?
This website uses referral links. Please read our disclosure policy for more information.
Homemade elderberry syrup recipe
I have included measurements for both fresh and dried elderberries so that you can use whichever form of elderberry you have on hand. (I make our elderberry syrup with fresh elderberries when they’re in season and use store-bought dried berries throughout the rest of the year.)
If you’re using FRESH elderberries, however, make sure that what you have is indeed black elderberry (sambucus nigra or sambucus canadensis) and not one of the poisonous elderberry look-alikes.
Whether you’re using fresh or dried elderberries to make the syrup, it is recommended that you don’t nibble on the berries!!! Eating uncooked black elderberries can cause a toxic buildup of cyanide in the body. Heating the berries destroys the mildly toxic properties of elderberries and makes them safe to consume.
Homemade Elderberry Syrup
Prep Time: 5 minutes
Cook Time: 15 minutes
Cooling time: 5-10 minutes
Makes: 2 cups of syrup
(The measurements in this recipe are approximate – using a little more or a bit less of anything isn’t going to ruin your syrup. You can also use additional ingredients like star anise or fresh ginger if you’d like.)
INGREDIENTS:
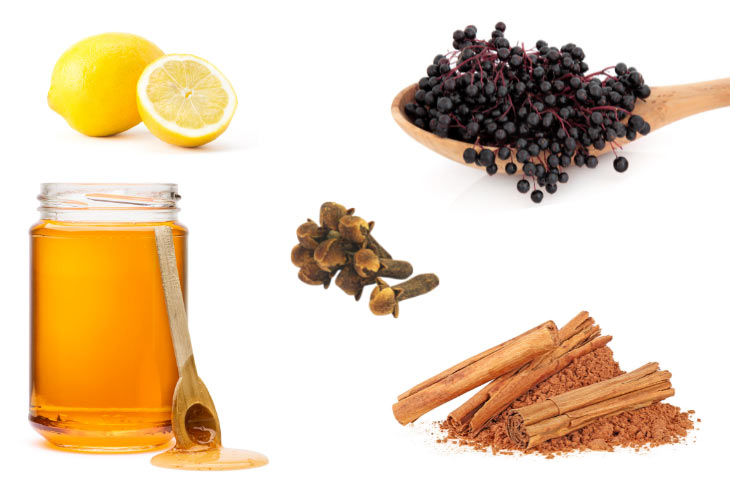
- ½ cup dried elderberries OR 1 cup fresh elderberries
- 2 cups water
- 1 cinnamon stick (or ½ tsp ground cinnamon)
- 3 whole cloves
- freshly squeezed juice from half a lemon
- ½ cup raw honey
It is NOT RECOMMENDED to give honey (both raw and pasteurized) to children under the age of 1 due to concerns over the possibility of botulism poisoning. Scroll down for suitable honey substitutes.
DIRECTIONS:
- Measure out the elderberries and remove any debris, stem pieces, lightly colored and green berries (=unripe), and leaves – if using fresh berries to make the syrup. (Stems, leaves, and unripe elderberries contain high amounts of cyanogenic glycosides and can cause cyanide toxicity.)
- Place elderberries + water + cinnamon + cloves in a saucepan. Gently bring to a boil, reduce heat, and simmer for about 15 minutes.
- Remove from heat and strain the mixture into another saucepan or a heat-resistant bowl using a mesh strainer. Gently squeeze the berries with the back of a spoon to get out as much juice as possible.
- Discard the berries and spices, and let the liquid cool down a bit.
- Once it cools down to a comfortable lukewarm temperature, add raw honey and mix well. (If you add raw honey to something hot, you’ve basically just killed the honey…)
- Add fresh lemon juice and stir.
- Pour the syrup in jars or bottles of your choice – refrigerate – consume.
Homemade elderberry syrup isn’t thick and syrupy like store-bought syrup (which is always heavily thickened). But you can thicken the syrup if you wish.
For a thick elderberry syrup recipe, add corn starch, tapioca starch, or arrowroot powder once the elderberries are cooked and strained. Bring the liquid back to simmer once more and add a thickener of your choice, following the directions on the box.
For what it’s worth, I have NEVER used any thickeners in all the years I’ve been making elderberry syrup. I actually don’t mind the not-so-syrupy consistency of homemade elderberry syrup. If I ever use any thickeners, I will let you know which one is my preferred choice.
Ingredient breakdown
You can easily make elderberry syrup using only water + elderberries + honey (or a honey substitute) for a healthy and delicious syrup.
It is NOT necessary to add the following ingredients:
- cinnamon
- cloves
- fresh lemon juice
Here is why these ingredients are in my final and best elderberry syrup recipe:
Cinnamon is one of the healthiest spices known to man, loaded with antioxidants and anti-inflammatory properties. That’s why I use it in our homemade elderberry syrup. (I prefer using cinnamon sticks, but ground cinnamon is a perfectly acceptable substitute.)
Cloves are naturally antibacterial, anti-inflammatory, antifungal, and a great immune booster overall. I also feel like cloves complement the taste of elderberries. If you don’t have cloves or don’t care for the taste of cloves, by all means, leave them out.
Lemons are rich in vitamin C. Fresh lemon juice strengthens the immune system and helps fight off many types of illnesses. Lemon juice is also a good natural preservative, so I wonder if it can help improve the shelf life of homemade elderberry syrup. You don’t want to add too much lemon juice because that would make the syrup way too sour, but feel free to add more (or less) than I use according to your preference.
Choosing quality honey is key!
Adding honey not only reduces the extreme tartness of elderberries (boy are these berries tart!) and makes the syrup somewhat thicker but also increases the medicinal benefits of elderberry syrup. You’ll want to use the real deal though (if you can) – RAW HONEY!
Some commercial honey isn’t really pure honey after all… (I got this first-hand from a honey inspector.)
Raw honey is honey that hasn’t been processed and retains the full spectrum of its nutritional value. Raw honey is antibacterial, antiviral, and antifungal. It contains all kinds of goodies – pollen, vitamins, minerals, trace enzymes, amino acids, phytonutrients, and other beneficial health-boosting elements. If you can get local raw honey, even better! Your local health food store will likely have a better selection than a grocery store.
Feel free to add more (or less) honey in your elderberry syrup using this recipe. I recommend going easy on any additional amount of honey so that you don’t add too much. You want a little bit of that elderberry tartness. That’s what makes the elderberry syrup taste so good!
Related: 12 Super Simple Ways to Boost Your Child’s Health!
Elderberry syrup recipe without honey
Whether you’re looking for a vegan elderberry syrup recipe or need to make elderberry syrup without honey for a baby, simply substitute honey with another natural sweetener like pure maple syrup which is rich in minerals, or just use table sugar.
The sweetness level of different sweeteners varies, so you may need to use more or less to offset the tartness of the syrup depending on the substitute of your choice. Start with less, and work your way up.
How long should elderberries be cooked?
Or rather the question should be: How long should you cook homemade elderberry syrup to retain the beneficial compounds of the black elderberry?
Most plant-based bioactive compounds tend to be heat-sensitive, and elderberry fruit is no exception.
Cooking on high heat reduces the medicinal properties of elderberry syrup just as cooking for too long will. At the same time, elderberries should undergo some amount of heat treatment to diminish their toxic properties due to the presence of cyanogenic glycosides which can cause cyanide poisoning if enough is ingested.
Many different recommendations exist for the cooking time of elderberries, but no clear elderberry cooking consensus is available. In fact, I myself have changed (reduced) the cooking time for this elderberry syrup recipe since this article was first published.
I have settled on cooking elderberries for about 15 minutes when making elderberry syrup, based on some of the research I came across:
Incubation in boiling water for 10-15 minutes seems effective in destroying a high percentage of cyanide-inducing glycosides that elderberries naturally contain (NOTE: the highest concentration within the berry is in the seeds which aren’t even used in the finished elderberry syrup). Additionally, a 15-minute hot water incubation seems to lead to roughly 15% reduction in the beneficial phenol content (approximately 10% reduction after 10 minutes of incubation, and 20% reduction after a 20-minute incubation) which, to me, is an acceptable loss. [source, source].
Feel free to cook the elderberries for more than 15 minutes if you wish, just keep in mind that the longer the berries are exposed to heat, the more medicinal properties may be lost.

Related: 21 Smart Ways to Save on Groceries (& Still Eat Healthy!)
Storing + shelf life of homemade elderberry syrup
It’s best to keep the syrup in lidded glass jars or bottles. Glass won’t leach harmful chemicals or microparticles into the syrup. You can even reuse empty jelly jars if you have any that are a good size. I would AVOID stainless steel containers since stainless steel is prone to leeching nickel when exposed to acidic substances.
Homemade elderberry syrup needs to be refrigerated. Or, you can freeze the syrup in ice cube trays or silicone molds and defrost as needed.
When stored in an airtight container in the fridge, homemade elderberry syrup will stay fresh for about 2 months. I find that if it sits for more than 2 months, mold often starts to grow. If it’s been a while since you bottled your syrup, check for mold and do a quick sniff/taste test first.
How much syrup to take?
So here’s the deal: I don’t have a PhD in Elderberry Science. You shouldn’t be taking any elderberry advice from me. Besides, the recommendations about elderberry syrup use and dosage vary. Just ask around and you’re bound to get a number of different responses.
Some people take elderberry syrup daily as a preventative measure, some only take it as a natural remedy when they’re sick or feeling like coming down with something. And some do both. Some take a teaspoon, others swear by a tablespoonful. One or two of either, or even a whole shot glass.
Not helpful, I know. So what do *WE* do???
As a preventative, we take elderberry syrup when we feel like it and IF we happen to remember. The kids get anywhere from 1 teaspoon-ish of elderberry syrup to a tablespoon or more (we don’t measure), and me and my hubs get about a tablespoon or two. (For children under 12 months old, I personally wouldn’t give more than 1/2 teaspoon – if that! – of honey-less elderberry syrup at a time.)
As a cure we like to take the syrup multiple times a day. I find it easier to just pour some of it into a shot glass and sip throughout the day. I’m not too worried about overstimulating the immune system with black elderberries to the point of triggering a cytokine storm when sick (but I urge you to research so that you can make your opinion on this topic), but if symptoms don’t improve, or worsen, then I guess it makes little sense to continue. Elderberry syrup can be an effective natural remedy for many situations where the immune system needs a little boost, but there are times when it may not improve the outcome.
Good to know: Clinical studies show that you are more likely to see the benefits of elderberry syrup if you take the syrup at the first sign of illness.
Just remember to resist the temptation to eat a handful of raw elderberries in place of elderberry syrup when you experience flu symptoms because that’s the best way to get an upset stomach. But if you have some dried or fresh elderberries you can use them to make elderberry tea as well – steep a bunch of elderberries in hot water for 10-15 minutes and add honey once done (raw or local honey is best).
This homemade elderberry syrup is very easy to make and tastes divine! Use this elderberry syrup recipe to boost your health during the flu season and beyond – elderberry syrup makes a great pancake and ice cream topper, too!


I have never had elderberry syrup and I’m looking forward to trying this recipe. My mom was a naturopath for 40 years and she made what i assume was an elderberry tincture. She would put dried elderberries in a brown gallon jug and add 2 liters of vodka, let it set for a month, then strain it. When we felt something coming on she’d give us an ounce. Mind you its nasty tasting stuff but it dang sure did the trick. I never heard her mention the cyanide-inducing glycosides so I’m wondering if the vodka eliminated that? Curious. I am happy to find a way to get in the benefits of elderberry without the vodka or harsh taste. Thank you.
Hi Ronda! The alcohol would help extract the medicinal properties of the elderberry but would have no effect on inhibiting the compounds capable of releasing cyanide. Assuming only the berries of the black elderberry were used in the elderberry tincture your mom made, the risks are truly miniscule. Enjoy the elderberry syrup if you do end up making it! 🙂
Just out of curiosity, could I boil the water with the cinnamon stick and cloves to get the flavor out and then turn that off and drop the berries in and steep like tea with a lid? Do you think that would eliminate the loss of medicinal benefits.
While it’s not recommended to consume elderberries without being boiled here in the U.S., including for the purposes of making elderberry tea, in my European home country it’s common to steep elderberries in hot water for 10-15 minutes to make tea (no additional boiling). I have done my fair share of throwing a few elderberries in a batch of herbal tea to steep. To answer your next question, gentle heat processing does not destroy the medicinal benefits of elderberries. 🙂
I would like to process my syrup in a canner for a longer shelf life. How long should I process pints?
Thank you
I have never further processed mine, so I’m unfortunately no help here. If you want to preserve the syrup’s medicinal properties, I would personally avoid canning and keep the process as gentle and low heat as possible. Otherwise, if you just want to make the syrup for its taste, I would follow the standard directions for canning.
To increase shelf life freezing is best!
Yup, I would think freezing would easily at least double the shelf life of elderberry syrup. Thank you for sharing! 🙂
This recipe looks great! I am getting ready to make this syrup, but I would like to double the recipe. My question is do I need to double the cinnamon sticks, cloves and honey, or do I use a lesser amount of each for the doubling? Thanks
Yes, just double all the spices you want to use. 🙂
What if you cook it for less than 45-60 mins? Will the good properties still be there?
Of course. In fact, the longer you cook the elderberries, the less beneficial compounds there’ll be. That being said though, it is recommended to cook the elderberry for at least a while to reduce the cyanide-inducing glycosides present in the seeds (it also helps the spices release their flavor). Now, as far as the exact minimal cooking time to break down the toxins in the elderberry, the recommendations even from scientific sources aren’t exactly clear. Unfortunately.